乱山残雪夜,孤烛异乡人
资产管理系统是用于帮助管理员管理和跟踪网络中计算机及网络设备的资产信息的软件,根据具体配置可以获取到资产的详细的软硬件信息及应用软件的安装下载情况。
GLPI简介
GLPI是法语Gestionnaire libre de parc informatique的缩写,是一款历史悠久的资产管理软件,他提供功能全面的IT资源管理接口,可以用来建立数据库来全面管理IT部门的电脑、显示器、服务器、打印机、网络设备、电话等多种资产信息,同时也提供文档、知识库、工单、合同、供应商、联系人等其他管理功能。
安装GLPI
环境搭建:centos7+apache+PHP5.6+MySQL5.7(关闭防火墙和selinux)、GLPI版本:9.4.4
GLPI是一个web应用服务器,所以需要:
- 网络服务器
- PHP
- 数据库
先把镜像源换为国内的源
备份
1 | mv /etc/yum.repos.d/CentOS-Base.repo /etc/yum.repos.d/CentOS-Base.repo.backup |
下载新的CentOS-Base.repo到/etc/yum.repos.d/
1 | wget -O /etc/yum.repos.d/CentOS-Base.repo http://mirrors.aliyun.com/repo/Centos-7.repo |
生成缓存
1 | yum makecache |
配置yum源
1 | yum install epel-release -y |
安装php
1 | yum install --enablerepo=remi --enablerepo=remi-php56 php php-opcache php-devel php-mbstring php-mcrypt php-mysqlnd php-phpuni-PHPUnit php-pecl-xdebug php-pecl-xhprof php-imap php-gd php-ldap |
安装LAMP
1 | yum -y install gcc gcc-c++ gcc-g77 flex bison autoconf automake bzip2-devel zlib-devel ncurses-devel libjpeg-devel libpng-devel libtiff-devel freetype-devel pam-devel openssl-devel libxml2-devel gettext-devel pcre-devel mysql mysql-server httpd |
安装Mysql5.7
1 | wget https://dev.mysql.com/get/mysql57-community-release-el7-11.noarch.rpm #下载 |
安装GLPI9.4.4
安装包下载地址:https://github.com/glpi-project/glpi/releases
1 | https://github.com/glpi-project/glpi/releases/download/9.4.4/glpi-9.4.4.tgz #下载wget |
浏览器中输入ip/glpi
可能出现的问题
提示“检查日志文件的写入权限”提示文件无法创建”,则需要修改glpi目录下的config和files文件夹:


1 | cd /var/www/html/glpi |
提示“对文件目录的Web访问被保护”,则需要修改apache配置:

修改apache的配置文件/etc/httpd/conf/httpd.conf
1 | <Directory /> |
把None修改为all,然后重启一下httpd服务
安装fusioninventory插件

点击查看插件目录,可看到能装在GLPI里的所有插件

这里选择fusioninventory此插件
安装包下载地址:https://github.com/fusioninventory/fusioninventory-for-glpi/releases
这里需要注意的是fusioninventory的版本一定要和GLPI的版本一致,例如我刚安装的GLPI版本是9.4.4的,这里的fusioninventory的版本也得是9.4.4的

将插件包解压到GLPI的plugins目录中

解压之后记得给权限
1 | chown apache:apache -R /var/www/html/glpi/plugins/fusioninventory |
此时再次刷新web界面就能看到fusion inventory插件了,点击安装、启用
可能出现的问题
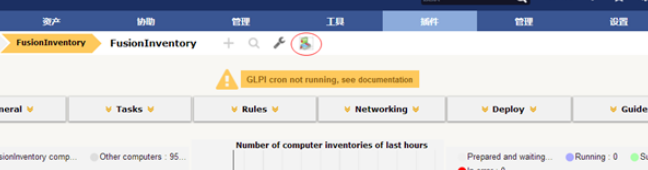
GLPI里打开FusionInventory插件界面,显示无法运行,提示“GLPI cron not running”:
原因:没有添加计划任务
设置定时任务:
1 | crontab -e |
在打开的文件里键入:
1 | * * * * * /usr/bin/php /var/www/glpi/front/cron.php &>/dev/null |
保存,退出
有时候插件的这个错误莫名其妙地突然出现,比如在导入数据库之后,而且设置定时任务没有效果。即使是定时任务,其中的指令也只是普通指令,所以我们可以手动执行之,即在终端直接执行:
1 | /usr/bin/php /var/www/html/glpi/front/cron.php |
小白一个,如有错误,欢迎指出!